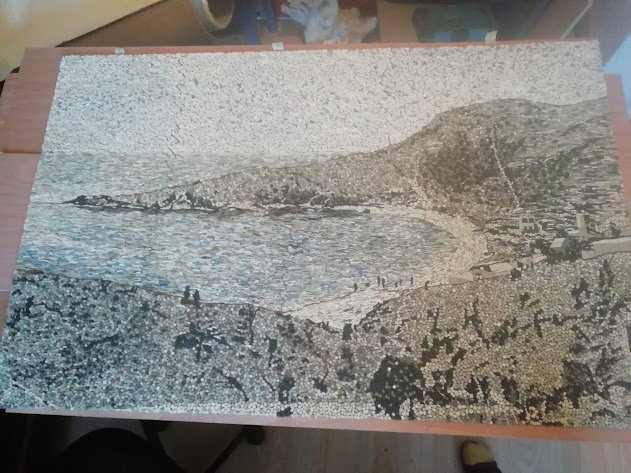
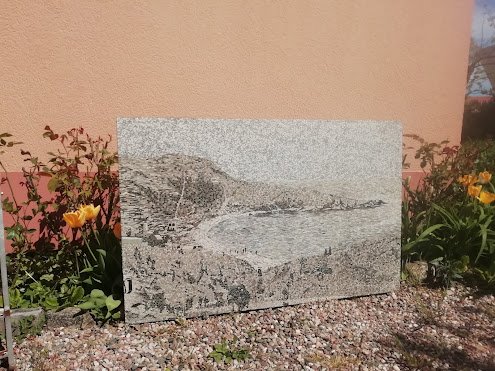
La Plage De L'Almadrava, Spain - A Black & white Mosaic
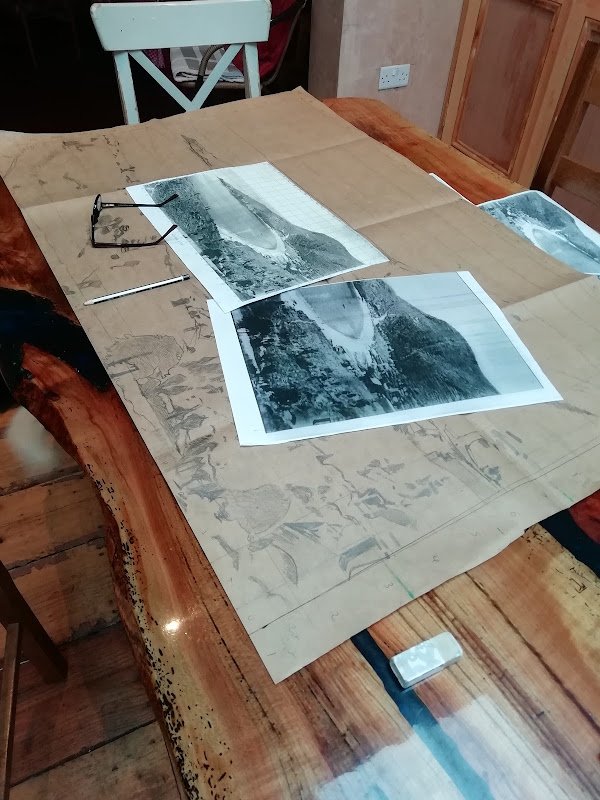
This commission took about 150 hours of work. It was enlarged from a black and white photo:
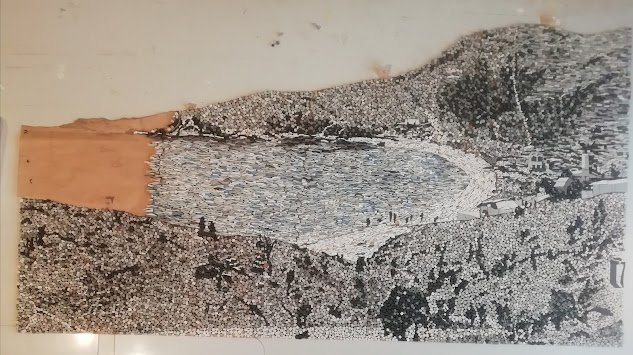
The plan was to reproduce the photo as faithfully as possible, details and colours.
I decided to use unglazed ceramic tiles, and to build the mosaic by means of a reverse method, in sections. The dimensions are 120 x 72 cm, which is too large to work directly on the final board, for ergonomic reasons. The use of direct method on mesh would have required such a fine mesh that it was unfeasible, as I planned to use a very small size of tesserae, and adopt a "messy" style, or pointillisme, with a chaotic assembly of tiny squares / triangles / rectangles to reproduce the grassy areas, the sandy beach, the sea and the sky. Any prominent buildings and features would be reproduced with larger tiles to emphasize them.
I divided the reverse drawing into 10 sections.
There were only 9 sections initially, but section 6 was too large and was divided later on.
The reverse plan, complete with dimensions and axes, and numbered sections. This will be useful for installation, to recognise the sections and place them correctly.
The colour scheme, being black and white, was a little tricky. There aren't sufficient shades of unglazed ceramics, and there was a risk of a rather dull and uniform final piece if I stuck to black and white. So I added a few pastel greens, creams, blues and browns to produce a visual separation between the land, sea, sand and sky.
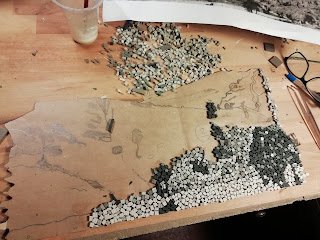
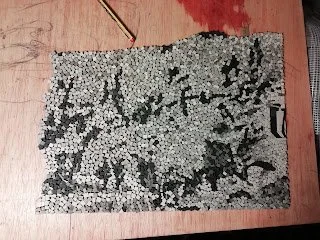
Once all was ready, I started on the section. You can see on the image below how the pointillisme is done. Very small squares, places in orderly chaos, so they do not align and give a general fuzzy impression, without lines or breaks.
This is very useful for gradations of colours or a messy background like a wild mediterranean maquis.
The first section finished, above. And the progress, below
Once all the sections were made, there remained the choice of substrate. I wanted a lightweight board such as Wediboard initially, but the fact that this was rather unavailable in such dimensions, and the difficulty of finding suitable fixings, gave way to the decision to use a cement based backer board, in this case a material used for formwork and reinforcing subterranean constructions. This is water resistant and hardwearing. Also very difficult to cut, but I was lucky to know someone with the right tools who cut it very precisely for me.
Before applying the mosaic sections, I had to prepare the board with the fixings at the back. The trick was to find a fixing which would be invisible, which would secure the mosaic against an outside brickwall and which would allow the removal of the mosaic if need be. After searching for a while, asking friends, colleagues and teachers at the London School of Mosaic, turning the options in my head at 3 am at night, and exploring a good few hardware shops, in London and in France, I finally found the ideal solution. Two rails, which would be screwed onto the brick wall, onto which 4 cleats would wedge themselves. This solution had only one drawback: the measurements had to be perfect for all the parts to fit into each other correctly.
Measuring, drilling and fixing the cleats to the backerboard. Masonry drill bit required, this hardiebacker type of backerboard is incredibly strong.
For added durability, I sprayed all the screws, washers, nuts and bolds with rustproof paint.
Now for the mixing of grout, and cement based adhesive.
I grouted the sections first, to prevent any cement to stick through the gaps, then prepared the backerboard with a thin layer of adhesive, ready to place the sections one after the other.
The board is framed with a temporary frame, to maintain clean edges. The sections are numbered, in the order in which they will be placed on the board.
The tools......
First, below, grouting the sections. And then placing the first section on the prepared board
One after the other, the sections are positioned, making sure that they fit perfectly.
The final cleaning, fixing, repairing, re-grouting and re-cleaning took a couple of days, some sections had run into each other, and a few areas had to be gouged out and re-laid. But the final mosaic was worth the effort!
All that remained to be done, was to go to the client's house and install the mosaic in its final resting place.
To make sure that the dimensions were absolutely exact, I had made a paper template, with the drilling holes marked exactly. This made installation a lot easier, especially the part where the client says "left a bit, up a bit... no, down a bit.." :)
Mitch the dog
Mitch is a rascal


